For step 42 and 43 I employed the help of tissue paper. I traced the quilting lines onto the tissue and then pinned it to the jacket back (folding in the darts). I had to fiddle a bit and adjust the quilting lines so that they matched up with the grain line. Then I pinned the lining to the tweed and machine stitched, following the woven design in the tweed. The threads are very thick so this wasn't difficult.
 |
| Machine Quilting In Line With Silk Tweed |
Steps 44 to 47 are all about attaching the back pieces to the front pieces at the side. First you attach the lining to the side seams of the fashion fabric with a running stitch. Then you machine stitch the fashion fabric at the side. Finally you do the overlap and slipstitch of the lining at the side. This is done using the same slipstitch as last week (See the video in my post). I'm really loving this stitch. It goes very quickly and is practically invisible.
Steps 48 and 49 are preparing the interfacing. I used cotton muslin.
Step 50 is attaching the interfacing to the hemline of the fashion fabric. This step in itself seems very confusing. The hemline is 1" from the edge (as stated in step 2) and the interfacing is to be even with this. Then blindstitch the bottom edge (I totally skipped this step as the hem will be sewn in the next one) and catchstitch the top edge, only to vertical seam allowances. Then use a running stitch to attach the hem facing to the front facing.
Step 51 is hemming.
Now, I'm going to do something crazy. I'm not adding a collar and I need to know how to handle the neckline. So, I'm jumping over to Vogue V8804. This is a similar pattern with a few different features. The directions for finishing the neckline are combined with the directions for finishing the front edge. Before I can start this series, I first need to attach the shoulder seams.
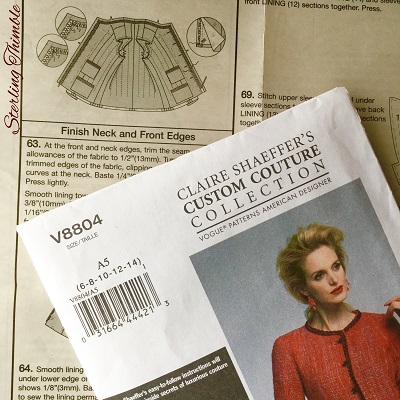 |
| Vogue V8804 ~ Claire Shaeffer's Custom Couture Collection ~ ~ Misses' Jacket ~ |
V8991 Step 56 to 59 give instructions for attaching the shoulder seams. It's a repetition of the previous instructions on how to sew the seam and then finish the lining. I'm really starting to like this slipstich and may be incorporating the technique into future lining projects. It gives a very nice finish.
Now that the shoulder seams are done, I can actually work on finishing the neck and front edges. Basically, I just muddled the two patterns' instructions together (V8991 and V8804) to come out with a turned in hem (fashion fabric) that has been trimmed and then catchstitched to the interfacing. Then the lining is trimmed, turned under, and slipstitched in place. The only back peddling that I needed to do was to unpick some stitches that secured the lining to the shoulder seams and the center back seam.
 |
| ~ I'm loving how the slipstitched lining has turned out. ~ |
Picking up where I left off, with Vogue 8991, in step 54 is how to add trim. I have never really decided what to use as trim for my jacket. I'm not really a trim sort of person. I'm rather plain. So the idea of a Chanel style trim is sort of foreign to me. I searched the internet for trim ideas. I like the fringed self fabric trim, and the blanket stitch trim, and even the jackets with no trim at all. In the end, I opted for no trimming. So, I was able to skip steps 54 and 55.
Steps 56 to 59 in V8991 give instructions on attaching the shoulder seams. I've already done that.
Steps 60 to 71 are all about the collar. However, as I already stated above, I didn't want to have a collar on my jacket so I was able to skip these steps.
Next, I'll be working on the sleeves. I've read that there are lots of issues with the sleeves. Please wish me luck in any alterations that I'll need to make. I'm actually looking forward to sewing more buttonholes.
It has become painfully clear to me that I will not be finishing this jacket before Thanksgiving. I won't have time to work on this before Christmas either. Perhaps it will go well enough that I can finish for New Year's Eve.
I hope that all of your sewing projects are going together like a dream.
Until next time,
Happy Stitching!!
~*~ Let's Connect ~*~
No comments:
Post a Comment
Thanks so much for your comments.